This article can be considered an update of our first article on installing Chamilo (on a Raspberry Pi B+). This time, we are testing it with Raspberry 3, as of the 1st of April 2017 (no joke intended). Last time, we were testing with Chamilo 1.9, which is arguably less load-intensive, considering it doesn't include any Symfony component, and it doesn't require any .htaccess configuration. This time, we will be trying Chamilo 1.11(.2), which includes dependencies managed by Composer, Symfony components, dependency on web redirections, and a series of things that can be considered to make it slower or more resource-intensive. Of course, the Raspberry Pi 3 is considerably more powerful than the Raspberry Pi 1 B+. To give you a quick idea, here is a table comparing the two models.
| Resource | Pi 1 B+ | Pi 3 B |
| CPU | ARM1176 (800MHz) | ARM Cortex-A53 (1.2GHz 64-bit cuad-core) |
| RAM | 512MB | 1GB |
| Networking | 1 RJ45 100Mbps ethernet | 1 RJ45 100Mbps ethernet + WiFi + BlueTooth (+USB3) |
Getting ready
Just a few reminders before we start... You will need:
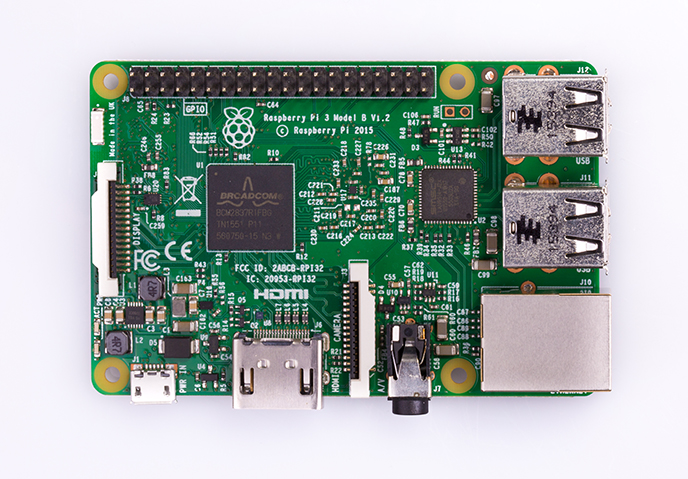
- A Raspberry Pi 3 Model B
- Its micro-USB charger
- An ethernet cable (feel free choose WiFi but we decided to go for the easiest config)
- A USB keyboard
- An HDMI cable
- An SD card class 4 or superior, with 8GB space or more (in our case and for benchmarking purposes, we're using a class 10 SD card)
- A screen (obviously) with HDMI connection
Installing Raspbian
First of all, installing Raspbian is one way to install an operating system on your Raspberry Pi. You can find the corresponding instructions on the Raspberry website here (you can choose either of the proposed options, but I chose a pre-installed Raspbian image). Once you have followed the installation instructions and have connected your Raspberry with a screen and a USB keyboard, you should be able to login by using the default access account: pi / raspberry
Installing the required software stack
You then need to prepare your software stack properly to later install Chamilo.
  sudo -s
  apt-get update
  apt-get -y upgrade
  apt-get install vim
  dpkg-reconfigure tzdata
(set your date and time there) The apt-get upgrade command might take a while to finish. Just let it run on the side. Remember this is a low-consumption device, so calculating packages dependencies, downloading, uncompressing and configuring all the software that's outdated might take you a while. You can choose to either use PHP 5 or PHP 7 with Chamilo 1.11. PHP 5 comes by default in Raspbian, but efficiency being a major point of our installation on the Raspberry, we'll go a (complex) step further and install PHP 7. There is documentation here on how to use PHP 7 packages, which are available in the Debian repositories for Stretch (version 9 of Debian, still in testing at the time of writing), on our Raspian Jessie (current stable version of Debian and Raspbian at the time of writing). Follow these instructions (except the Deluge part), then come back here.
apt-get install nginx-full mariadb-server-10.0 mariadb-client-10.0 php7.0-fpm \
 php7.0-gd php7.0-curl php7.0-mcrypt php7.0-mysql php7.0-mbstring php7.0-intl \
 php7.0-xml php7.0-apcu vim
This should install about 200MB of software on your Raspberry and (in the process) ask you to define a password for your MySQL installation. Given this is a test platform, let's agree to simply use "chamilo" as root password for the database. This should also ask you if you agree to restart services during the installation. Considering this is an installation an nothing of importance is really running, you can simply say "Yes". Finally, know that this is likely to take several hours to execute. Take patience. If you have issues with keyboard keys mapping, use dpkg-reconfigure keyboard-configuration
Downloading Chamilo
The easiest (although slowest) way, for development installations, to download Chamilo is to download it from Github*:
cd /var/www/
wget https://github.com/chamilo/chamilo-lms/releases/download/v1.11.2/chamilo-lms-1.11.2.tar.gz
tar zxf chamilo-lms-1.11.2.tar.gz
mv chamilo-lms-1.11.2 chamilo
Configuring Nginx, PHP-FPM, MySQL and Chamilo
Once you've got everything installed, you'll need to configure the distinct applications.
Nginx
The first service you should configure is Nginx (the web server). The server_name param is configured as the current IP of the Raspberry (which you can get with the ifconfig command), so you should configure it to your own value.
cd /etc/nginx/sites-available/
vim default
server {
  listen 80;
  access_log /var/log/nginx/chamilo-access.log;
  error_log /var/log/nginx/chamilo-error.log notice;
  root /var/www/chamilo;
  index index.php index.html index.htm;
  server_name 192.168.178.24;

  location @rewrite{
   rewrite ^certificates/$ certificates/index.php last;
   rewrite ^/courses/([^/]+)/$ /main/course_home/course_home.php?cDir=$1 last;
   rewrite ^/courses/([^/]+)/index.php$ /main/course_home/course_home.php?cDir=$1 last;
   rewrite "^/courses/([^/]+)/scorm/(.*)$" /app/courses/$1/scorm/$2 break;

   rewrite "^/courses/([^/]+)/document/certificates/(.*)$" /app/courses/$1/document/certificates/$2 last;
   rewrite ^/courses/([^/]+)/document/(.*)$ /main/document/download.php?doc_url=/$2&cDir=$1 last;
   rewrite ^/courses/([^/]+)/upload/([^/]+)/(.*)$ main/document/download_uploaded_files.php?code=$1&type=$2&file=$3 last;
   rewrite ^/courses/([^/]+)/work/(.*)$ /main/work/download.php?file=work/$2&cDir=$1 last;
   rewrite ^/courses/([^/]+)/(.*)$ /app/courses/$1/$2 last;
   rewrite ^/session/([^/]+)/about/?$ /main/session/about.php?session_id=$1 last;
   rewrite ^/badge/(\d+) /main/badge/issued.php?issue=$1 last;
   rewrite ^/skill/(\d+)/user/(\d+)$ /main/badge/issued_all.php?skill=$1&user=$2 last;
   rewrite ^/badge/(\d+)/user/(\d+)$ /main/badge/issued_all.php?skill=$1&user=$2 last;
   rewrite ^/main/exercice/(.*)$ /main/exercise/$1 last;
   rewrite ^/main/newscorm/(.*)$ /main/lp/$1 last;
   rewrite ^/service/(\d+)$ /plugin/buycourses/src/service_information.php?service_id=$1 last;
   rewrite "^/main/upload/users/(.*)/(.*)/my_files/(.*)$" /app/upload/users/$1/$2/my_files/$3 last;
   try_files $uri /index.php$is_args$args;
   break;
 }

 location /main {
  rewrite ^/main/admin/?$ /main/admin/index.php last;
 }
 location ~ \.php$ {
  client_max_body_size 200M;
  try_files $uri @rewrite;

  include snippets/fastcgi-php.conf;
  # we would normally expire after 5 minutes, but on a Raspberry it's probably
  # not worth waiting that long if we know we are potentially blocking other users
  expires 1m;

  # With php-fpm (or other unix sockets):
  fastcgi_pass unix:/var/run/php/php7.0-fpm.sock;
  fastcgi_read_timeout 10800;
 }

 # Serve static files directly
 location ~* \.(png|jpe?g|gif|ico|js|css|mp3|swf|flv|mp4|ogg|html|htm|woff|woff2)$ {
  expires 1y;
  #access_log off;
  rewrite ^/courses/([^/]+)/course-pic85x85.png$ /app/courses/$1/course-pic85x85.png last;
  rewrite ^/courses/([^/]+)/course-pic.png$ /app/courses/$1/course-pic.png last;
  try_files $uri @rewrite;
 }
 location ~ ~\.(ht|git){
  deny all;
 }

 location ^~ /tests/ {
  deny all;
 }

 location / {
  try_files $uri @rewrite;
 }
}
Let's wait before reloading the configuration, because we also need to setup PHP-FPM and MySQL. The very large value for fastcgi_read_timeout (1h) is for the installation process to finish properly. This can be reduced to 60 or so after the installation. This is also through for PHP-FPM's config below.
PHP-FPM
PHP-FPM (FastCGI Process Manager) is an alternative PHP FastCGI implementation with some additional features useful for sites of any size, especially busier sites. It was first included in PHP version 5.3.3 and reached production grade as of 5.4. Configuring FPM is essential to get PHP running behind Nginx. There's nothing that requires a change in php.ini. Everything can be done in the corresponding "pool" of FPM. The excerpt below is only showing the lines you should modify.
vim /etc/php/7.0/fpm/pool.d/www.conf
pm.max_children = 32
pm.start_servers = 4
pm.min_spare_servers = 4
pm.max_spare_servers = 8
php_admin_value[short_open_tag] = off
php_admin_value[session.cookie_httponly] = on
php_admin_value[upload_max_filesize] = 200M
php_admin_value[post_max_size] = 200M
php_admin_value[allow_url_fopen] = on
php_admin_value[date.timezone] = Europe/Brussels
php_admin_value[max_execution_time] = 3600
The last setting (date.timezone) is very important to configure, as Chamilo will protest if you don't. Set it to your timezone. Enabling the Zend Optimizer has to be done manually by editing the opcache.ini file:
vim /etc/php/7.0/fpm/conf.d/10-opcache.ini
; configuration for php ZendOpcache module
; priority=10
zend_extension=opcache.so
opcache.enable=On
opcache.memory_consumption=128
opcache.max_accelerated_files=6000
opcache.revalidate_freq=120
opcache.fast_shutdown=1
; Special optimization: do not used cwd to cache files as
; on this install there's only one php app
opcache.use_cwd=0

vim /etc/php/7.0/fpm/conf.d/20-apcu.ini

extension=apcu.so
apc.enabled=1
MariaDB
There are only a few things that you can change to MySQL's config to make it more efficient in the Chamilo + Raspberry Pi context. Most of these custom settings are largely inspired by a post on the Raspberry Pi forums. Here are the lines you should add to a new file created at /etc/mysql/mariadb.conf.d/mariadb.cnf: vim /etc/mysql/mariadb.conf.d/mariadb.cnf
[mysqld]
skip-external-locking
key_buffer_size = 16M
max_allowed_packet = 1M
table_open_cache = 256
sort_buffer_size = 1M
net_buffer_length = 16K
read_buffer_size = 1M
read_rnd_buffer_size = 512K
myisam_sort_buffer_size = 8M
query-cache-type = 1
query-cache-size = 20M
thread_cache = 16
join_buffer_size = 2M
max_connections = 50
aria-pagecache-buffer-size=20M
key-cache-segments=4
server-id       = 1
sync_binlog=0
[mysql]
no-auto-rehash
In particular, we *reduce* the max_connections setting to 50 (instead of the default 100) because otherwise MySQL will use too much memory for FPM to be able to run its PHP processes efficiently. Connect to the database to create a user account (changing the password):
mysql -u root -p
grant all privileges on chamilo.* to chamilo@localhost identified by 'chamilo';
create database chamilo;
flush privileges;
exit;
It is worth noting that MariaDB 10 seems awfully slow for *some* operations. For example, the creation of a simple *table* might last 50 seconds or so. The installation process creating more than 240 tables, this makes for a very lengthy process. The creation of a new course inside Chamilo is also very slow (several minutes). Most other operations seem to be handled much faster, but the teachers will have to be very patient when building their content. Chamilo configures tables in InnoDB by default. That's because for lots of data and many simultaneous connections, InnoDB is more efficient than MyISAM (the default for most MySQL/MariaDB installations). However, on a Raspberry, InnoDB has the opposite effect and make things quite slow. To avoid that, you can convert a series of tables (not all) to MyISAM with this short procedure. This will not convert *all* tables to MyISAM, and there could be value in converting more of them manually (first removing foreign keys), but the following should be enough for a quick optimization.
mysql -u root -p chamilo -e "SHOW TABLES" > /tmp/tables
vim /tmp/tables
:%s/^/ALTER TABLE /
:%s/$/ ENGINE=MyISAM;/
:wq
mysql -u root -p chamilo < /tmp/tables
This might take a while (possibly one hour or so) but should positively impact performance.
Chamilo
Once you got all this setup, you'll need to restart all these services...
service mysql restart
service php-fpm restart
service nginx restart
and then install Chamilo following the normal installation procedure (this requires enabling a MySQL user for your Chamilo - preferably not root directly). Use your Raspberry's IP address to connect through your browser and be prompted by the installation procedure. [caption id="attachment_4418" align="aligncenter" width="300"]![]() Chamilo 1.11 Installation homepage[/caption] In particular, don't forget to set permissions:
Chamilo 1.11 Installation homepage[/caption] In particular, don't forget to set permissions:
cd /var/www/chamilo
chown -R www-data:www-data app web main/lang main/default_course_document/images
Once you've done that, you'll have to edit the configuration file to get the name resolution right, even if you change IPs or domain names in the future. Find the "root_web" line, and replace it as follows (in this example, replace 192.168.178.24 by the IP of your Raspberry, or leave it if already configured correctly):
vim /var/www/chamilo/app/config/configuration.php
// URL to the root of your Chamilo installation, e.g.: http://www.mychamilo.com/
$_configuration['root_web'] = 'http://192.168.178.24/';
if (!empty($_SERVER['HTTP_HOST'])) {
    $_configuration['root_web'] = 'http://'.$_SERVER['HTTP_HOST'].'/';
}
This will allow any domain to be used to load Chamilo, but will force it into HTTP mode. If you want to use HTTPs (which we recommend), you'll have to make the necessary changes to this tutorial, which is limited to HTTP.
Starting up Chamilo
Now you can load Chamilo into your web browser (by pointing it to your Raspberry). The first things you'll need to configure (by going to the administration panel and selecting "Platform settings"), for increased efficiency, are:
- disable the "hot courses" block (it requires a lot of processing for the voting starts)
- disable the display of "online users" (for the three types)
- disable all unnecessary languages (preferably keeping only one)
This should considerably alleviate your installation. [caption id="attachment_4427" align="aligncenter" width="300"]![]() Homepage of a first test course[/caption] This is it! You have a "ChamiPi" running! Congrats! I have added information on load testing below, so you know what to expect.
Homepage of a first test course[/caption] This is it! You have a "ChamiPi" running! Congrats! I have added information on load testing below, so you know what to expect.
Load testing
Apache Benchmark is available as the apache2-utils package on your computer, and is to be used like this:
ab -n 400 -c 10 http://192.168.178.24/
This will request 400 pages by simulating 10 different computers queuing simultaneously for an answer from the server. With different optimizations as described above, we managed to get an average of 13.45 requests per second (a 743% increase in effectiveness from 1.8r/s with PHP 5.6 on the Raspberry Pi Model B+) on the homepage of Chamilo (arguably not the heaviest page to load). When boosting the test to 50 simultaneous requests, the number of requests per second falls steadily to 13.04, which is only normal considering the cuad-core processor. An additional test at 100 simultaneous requests (with 400 total loads) make the requests per second fall back a little to 10.49. Here, a short table of comparison, also showing that starting above 100 concurrent requests, the system starts failing and sending errors.
| Concurrent requests | Requests/Second | Failed requests |
| 5 | 18.11 | 0% |
| 10 | 13.45 | 0% |
| 25 | 10.78 | 0% |
| 50 | 13.04 | 0% |
| 100 | 10.49 | 0% |
| 200 | 46.56 | 26% |
Extra: Installing offline Wikipedia
If you're really thinking about a disconnected (from Internet) installations (which the Raspberry is particularly good for), you will probably be interested by this section. Otherwise you can just skip to the conclusion. Note that this static version of Wikipedia is old and comes without images, but it's still a good resource.
Offline Wikipedia requirements
To download the offline Wikipedia compressed file, go to https://dumps.wikimedia.org/other/static_html_dumps/. As you will see, these dumps have not been updated since 2008, but the procedure to restore a recent (non-static) version of Wikipedia is just ununderstandably complex, so we'll go with this one. Select the latest folder and go to the subfolder that represents the 2-letters language code you're looking for ("es" for Spanish, "fr" for French, etc). We'll take the Spanish language as example. In this case, and even if it's from 2008, we'll still get 370K articles in Spanish (slightly outdated for the frequently updated articles), so not too bad for a convenient resource. You will only need the file that says "wikipedia-{language}-html.tar.7z". Note that indicated sizes might be disturbing. For example, if the .7z compressed Spanish file here indicates that it's about 1.3GB in size, once uncompressed it will take more than 21GB, meaning that, together with your Chamilo installation and the temporary uncompressed tar file, you will probably need more than a 32GB micro-SD card to store the whole system. The compressed file for the French language is almost double that, suggesting even a 64GB micro-SD card might not be enough. Some 128GB (and even 256GB) microSD cards are now available, but their price is several times the price of the Raspberry, which might make you reconsider... Anyway, once you've downloaded the Spanish language .7z file, put it on the microSD card (in whatever directory for now) and "unzip" it. You will need to install the "p7zip-full" package for that (sudo apt-get install p7zip-full), then launch
p7zip -d wikipedia-es-html.tar.7z
This will create a wikipedia-es-html.tar file. Now you need to untar it:
tar xf wikipedia-es-html.tar
It is likely these two operations above, together, will take more than 10 hours to complete, so leave it running somewhere and if necessary launch that through the "screen" virtual terminal command (which you will have to install). This will create a wikipedia/es/ folder. Given this is the only language we will have there, we will move the "es/" directory as a whole into a "wikipedia/" subdir of Chamilo:
mv wikipedia/es/ /var/www/chamilo/wikipedia
Now you have Wikipedia installed under your Chamilo installation. How do we make it available?
Nginx setup for offline Wikipedia
Before we do anything else, we will have to rewrite part of the configuration for the Chamilo virtual host in Nginx. This is because we normally want Chamilo to check the access to all files within the Chamilo folder, but in this case we'll make an exception because this would take an incredibly long time for Chamilo to check files, process all the possible redirections and then decide to give access to the files or not. Furthermore, some rules we have contradict the way those files should be accessed within the wikipedia folder. Also, this static version of Wikipedia files tries to find a /w/index.php file that doesn't exist. If we left our normal Chamilo rules, Nginx would go through about 20 redirections to find this file if not immediately found. Here is our modified nginx virtual host file for Chamilo:
cd /etc/nginx/sites-available/
vim default
server {
  listen 80;
  access_log /var/log/nginx/chamilo-access.log;
  error_log /var/log/nginx/chamilo-error.log notice;
  root /var/www/chamilo;
  index index.php index.html index.htm;
  server_name 192.168.178.24;

  location @rewrite{
   rewrite ^certificates/$ certificates/index.php last;
   rewrite ^/courses/([^/]+)/$ /main/course_home/course_home.php?cDir=$1 last;
   rewrite ^/courses/([^/]+)/index.php$ /main/course_home/course_home.php?cDir=$1 last;
   rewrite "^/courses/([^/]+)/scorm/(.*)$" /app/courses/$1/scorm/$2 break;

   rewrite "^/courses/([^/]+)/document/certificates/(.*)$" /app/courses/$1/document/certificates/$2 last;
   rewrite ^/courses/([^/]+)/document/(.*)$ /main/document/download.php?doc_url=/$2&cDir=$1 last;
   rewrite ^/courses/([^/]+)/upload/([^/]+)/(.*)$ main/document/download_uploaded_files.php?code=$1&type=$2&file=$3 last;
   rewrite ^/courses/([^/]+)/work/(.*)$ /main/work/download.php?file=work/$2&cDir=$1 last;
   rewrite ^/courses/([^/]+)/(.*)$ /app/courses/$1/$2 last;
   rewrite ^/session/([^/]+)/about/?$ /main/session/about.php?session_id=$1 last;
   rewrite ^/badge/(\d+) /main/badge/issued.php?issue=$1 last;
   rewrite ^/skill/(\d+)/user/(\d+)$ /main/badge/issued_all.php?skill=$1&user=$2 last;
   rewrite ^/badge/(\d+)/user/(\d+)$ /main/badge/issued_all.php?skill=$1&user=$2 last;
   rewrite ^/main/exercice/(.*)$ /main/exercise/$1 last;
   rewrite ^/main/newscorm/(.*)$ /main/lp/$1 last;
   rewrite ^/service/(\d+)$ /plugin/buycourses/src/service_information.php?service_id=$1 last;
   rewrite "^/main/upload/users/(.*)/(.*)/my_files/(.*)$" /app/upload/users/$1/$2/my_files/$3 last;
   try_files $uri /index.php$is_args$args;
   break;
 }

 location /main {
  rewrite ^/main/admin/?$ /main/admin/index.php last;
 }

 # Rule to avoid Wikipedia search for an unexisting index.php
 location ^~ /w/index.php {
   return 404 /404.html;
 }
 location ~ \.php$ {
  client_max_body_size 200M;
  try_files $uri @rewrite;

  include snippets/fastcgi-php.conf;
  # we would normally expire after 5 minutes, but on a Raspberry it's probably
  # not worth waiting that long if we know we are potentially blocking other users
  expires 1m;

  # With php-fpm (or other unix sockets):
  fastcgi_pass unix:/var/run/php/php7.0-fpm.sock;
  fastcgi_read_timeout 10800;
 }

 # Serve static files from Wikipedia directly and avoid many rewrite rules that do not apply
 location ~* ^/wikipedia/.*\.(png|jpe?g|gif|ico|js|css|mp3|swf|flv|mp4|ogg|html|htm)$ {
  expires 1y;
  try_files $uri 404;
 }

 # Serve static files directly
 location ~* \.(png|jpe?g|gif|ico|js|css|mp3|swf|flv|mp4|ogg|html|htm)$ {
  expires 1y;
  #access_log off;
  rewrite ^/courses/([^/]+)/course-pic85x85.png$ /app/courses/$1/course-pic85x85.png last;
  rewrite ^/courses/([^/]+)/course-pic.png$ /app/courses/$1/course-pic.png last;
  try_files $uri @rewrite;
 }
 location ~ ~\.(ht|git){
  deny all;
 }

 location ^~ /tests/ {
  deny all;
 }

 location / {
  try_files $uri @rewrite;
 }
}
Once the file has been modified, don't forget to reload Nginx
service nginx reload
Linking from Chamilo
Although this static Spanish Wikipedia version is now inside the Chamilo installation, your users will not know that it's there until you tell them or add a link to it. That's what you'll do now. In Chamilo, login as admin, then go to Chamilo > Configure Homepage, and at the bottom of the page click "Add link" in the central section (not in the menu block). Fill the form as follows:
- Link title: Wikipedia
- Link URL: /wikipedia/index.html
- Check the "apply to all languages" box
- Save
This is not done yet. Because Chamilo has a link validation here, we still need to fix a few links by hand inside the app/home/ folder. On the command line: cd app/home/ find . -type f -exec sed -i 's/http:\/\/([\d\.]*)\/wikipedia/\/wikipedia/g' {} + This should do the trick. Now your Chamilo portal will show a Wikipedia tab that leads your users to an image-less static version of Wikipedia, with no Internet connection whatsoever. ![]()
![]()
Conclusion
Energy consumption and size of the Raspberry Pi makes it interesting for remote schools scenarios where energy is scarce and security (theft risk) is an issue (a Raspberry Pi device can easily remain hidden from anyone's sight). Actually, we've tested the Raspberry running on a 10,000mAh backup battery for mobile phones and got past 6 hours of continuous (simulated) use. The speed of 13.45 request per second, in comparison with the previous 1.8 r/s of the Pi 1 B+, demonstrates it is now fast enough for a typical "classroom" scenario where around 50 computers might be connected using a Chamilo portal. However, no miracle should be expected here: pages are still a bit slow for logged-in users, but one can get around the psychological stress with a bit of patience. We heard that other types of devices (Banana Pi and stuff like that) are more focused on processing power, which might be a good solution to get more out of your unplugged Chamilo portal. We do not cover this here, though. Although we did use a fair amount of optimization settings (tuned MariaDB 10, a tuned PHP-FPM with OpCache and APCU and a very slightly tuned Nginx), it also demonstrates Chamilo 1.11 remains very light in terms of resources consumptions, making it a much more viable option than its other open source equivalents. When we installed the static Wikipedia dump there, it became practically impossible to use the system, before we understood that was actually caused by a non-proper redirect to Chamilo's /index.php for static files of Wikipedia. Once that's fixed, Wikipedia use is a breeze and Chamilo can be used normally again. If used in this context, we would recommend no more than 50 computers at the same time, and some patience (although people in areas without Internet are generally quite patient) to use the system. If these criteria are respected, there should be no big issue using Chamilo LMS. Finally, it's worth noting that, with the addition of the "Reading comprehension" quiz type in Chamilo 1.11.4 (to be released in a few weeks), this configuration will potentially become a unique tool for teachers in remote areas to measure more efficiently the reading capabilities of students and take sounder decisions sooner in the children learning process.
Comments
Hi,
I am trying to setup a solar powered raspberry pi Chamilo server for a really remote and troubled area where schools have either no or very poor internet connection.
I have successfully followed your instructions and Chamilo is running on my pi 3.
I have added an extra wifi dongle to have an access point for wireless login into Chamilo with the hope that learners will be able to use tablets or most likely smartphones to access.
The load testing for wlan1 address (as a result of my configuration of DHCP) and eth0 address (assigned by my DSL connection) seems to be somewhat different.
Benchmarking 192.168.10.5 (be patient)
Completed 100 requests
Completed 200 requests
Completed 300 requests
Completed 400 requests
Finished 400 requests
Server Software: nginx/1.6.2
Server Hostname: 192.168.10.5
Server Port: 80
Document Path: /
Document Length: 34000 bytes
Concurrency Level: 10
Time taken for tests: 22.899 seconds
Complete requests: 400
Failed requests: 0
Total transferred: 13767200 bytes
HTML transferred: 13600000 bytes
Requests per second: 17.47 [#/sec] (mean)
Time per request: 572.487 [ms] (mean)
Time per request: 57.249 [ms] (mean, across all concurrent requests)
Transfer rate: 587.11 [Kbytes/sec] received
Connection Times (ms)
min mean[+/-sd] median max
Connect: 0 1 1.3 0 10
Processing: 205 570 746.4 434 5306
Waiting: 200 439 188.6 416 2100
Total: 205 570 746.3 435 5307
Percentage of the requests served within a certain time (ms)
50% 435
66% 467
75% 496
80% 516
90% 565
95% 1240
98% 5002
99% 5089
Test with wlan1 address
Server Software: nginx/1.6.2
Server Hostname: 192.168.42.1
Server Port: 80
Document Path: /
Document Length: 34000 bytes
Concurrency Level: 10
Time taken for tests: 18.293 seconds
Complete requests: 400
Failed requests: 0
Total transferred: 13767200 bytes
HTML transferred: 13600000 bytes
Requests per second: 21.87 [#/sec] (mean)
Time per request: 457.321 [ms] (mean)
Time per request: 45.732 [ms] (mean, across all concurrent requests)
Transfer rate: 734.96 [Kbytes/sec] received
Connection Times (ms)
min mean[+/-sd] median max
Connect: 0 0 1.1 0 13
Processing: 172 455 118.3 430 984
Waiting: 169 442 116.6 420 966
Total: 173 455 118.4 431 984
Percentage of the requests served within a certain time (ms)
50% 431
66% 487
75% 515
80% 541
90% 606
95% 696
98% 763
99% 781
100% 984 (longest request)
pi@raspberrypi:~ $
Do they mean anything? I am not a professional but just a raspberry pi user and do not understand much about this.
Would this performance work for a group of 40-50 learners?
I have just finished installation and may need your help in my further work as well.
Thanks a lot for sharing your valuable work,
Lutfullah
Hi Lutfullah,
Did you do the MyISAM table conversion as suggested around the end of the article? (this is important for speed)
Remember an "ab" command, under basic conditions, will just test the rendering of the homepage, which does not mean much for a Chamilo portal in real user, but it is a good measurement of the kind of delay you can expect. Here you had a requests/second rate of 21, which is quite OK (it means 21 users could have been served in just one second).
However, it is important to note that when students will log-in to Chamilo, they will be generating much more database interaction, which will slow down the response rate considerably. Now, this might not be too problematic, considering that users in disconnected areas might be very happy with an application that is a little slow.
Also, the results of "ab" show the time taken to load the homepage's HTML structure, but it does not include all the icons, javascript and CSS files that come with it. That should be an issue when loading the homepage for the first time on each tablet, but then the following requests will have those elements stored in the tablet's browser's cache memory, so that shouldn't be an issue past the first 2-3 pages. To avoid the issue, we generally recommend teachers to pre-load Chamilo on each tablet before their student start using it. This way the tablets already have some of the resources in cache and students don't have to wait.
To make sure all these resources are stored in cache as long as possible, check the "location" blocks in the Nginx configuration (I just added the two last "woff" extensions in the location block for static resources). This is actually telling the browser to store all these resources for one full year. This might be problematic when updating Chamilo to another version (resources won't be updated in the browser unless you delete the cache), but in our experience, that doesn't happen frequently on disconnected setups.
So, in short, if you have followed the article above completely and pre-load Chamilo on the tablets, I believe you could get to 40-50 learners with a reasonnable response time. This setup should be treated as experimental, however, and I hope you can come back to us in the future to tell us if that worked out well! We can maybe optimize a few things, but sadly there is not much space for optimization anymore at the moment.
Please *do* execute the small configuration tips I mentioned (disabling unused languages, the display of online users and the "hot courses" block, as these can be processing killers.